Please watch video in (picture-in-picture) mode to take advantage of timestamps on each key point below
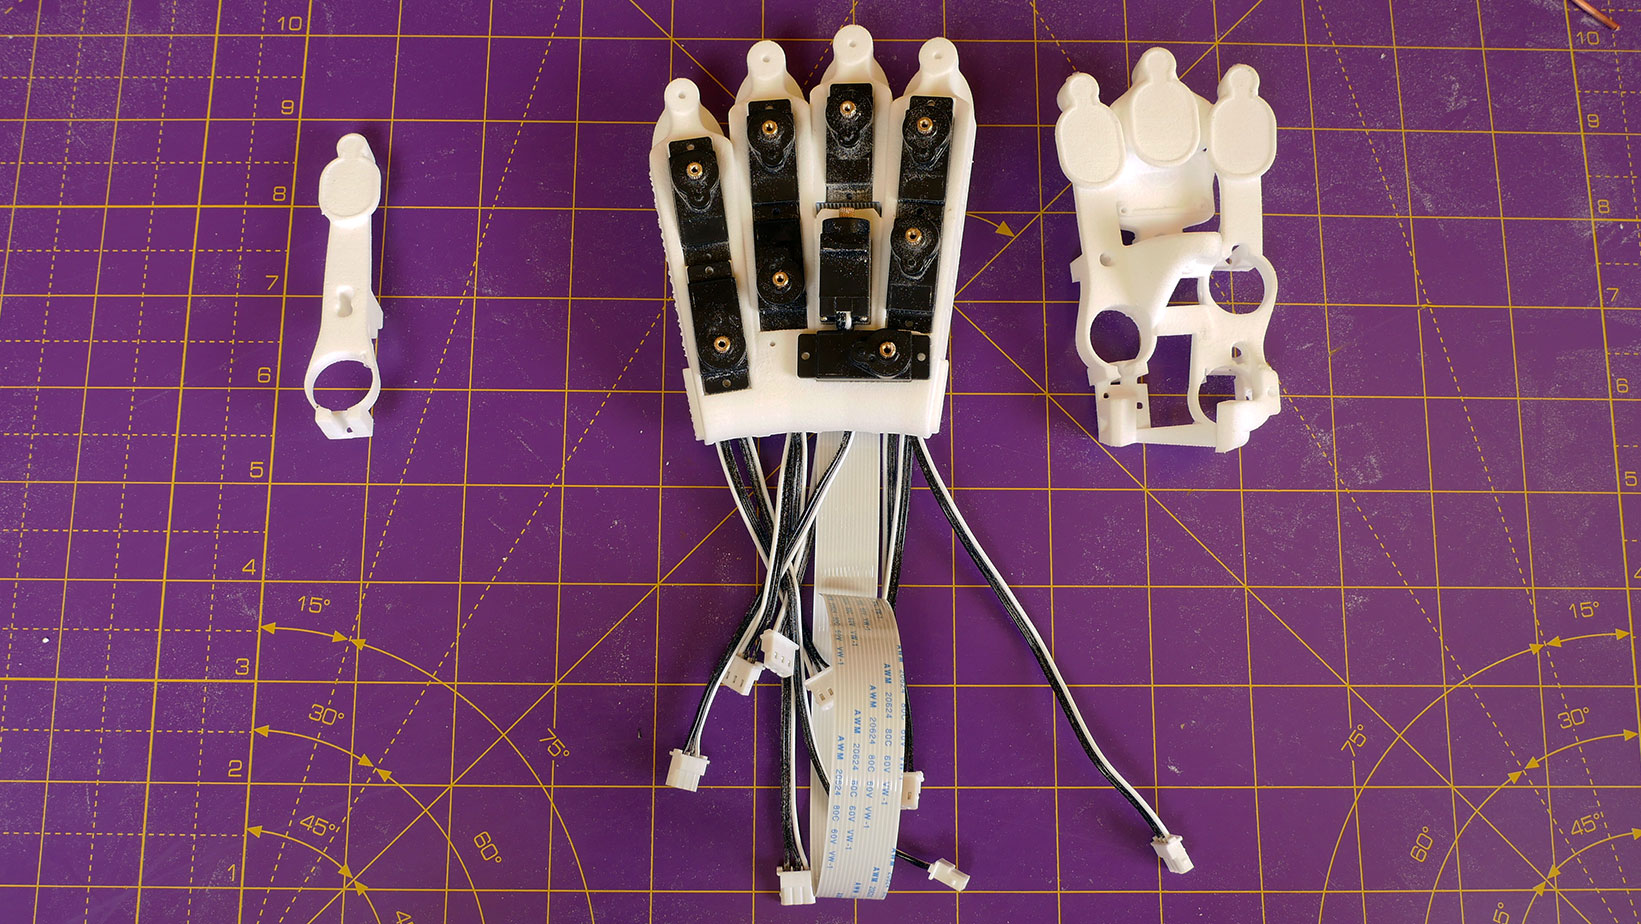
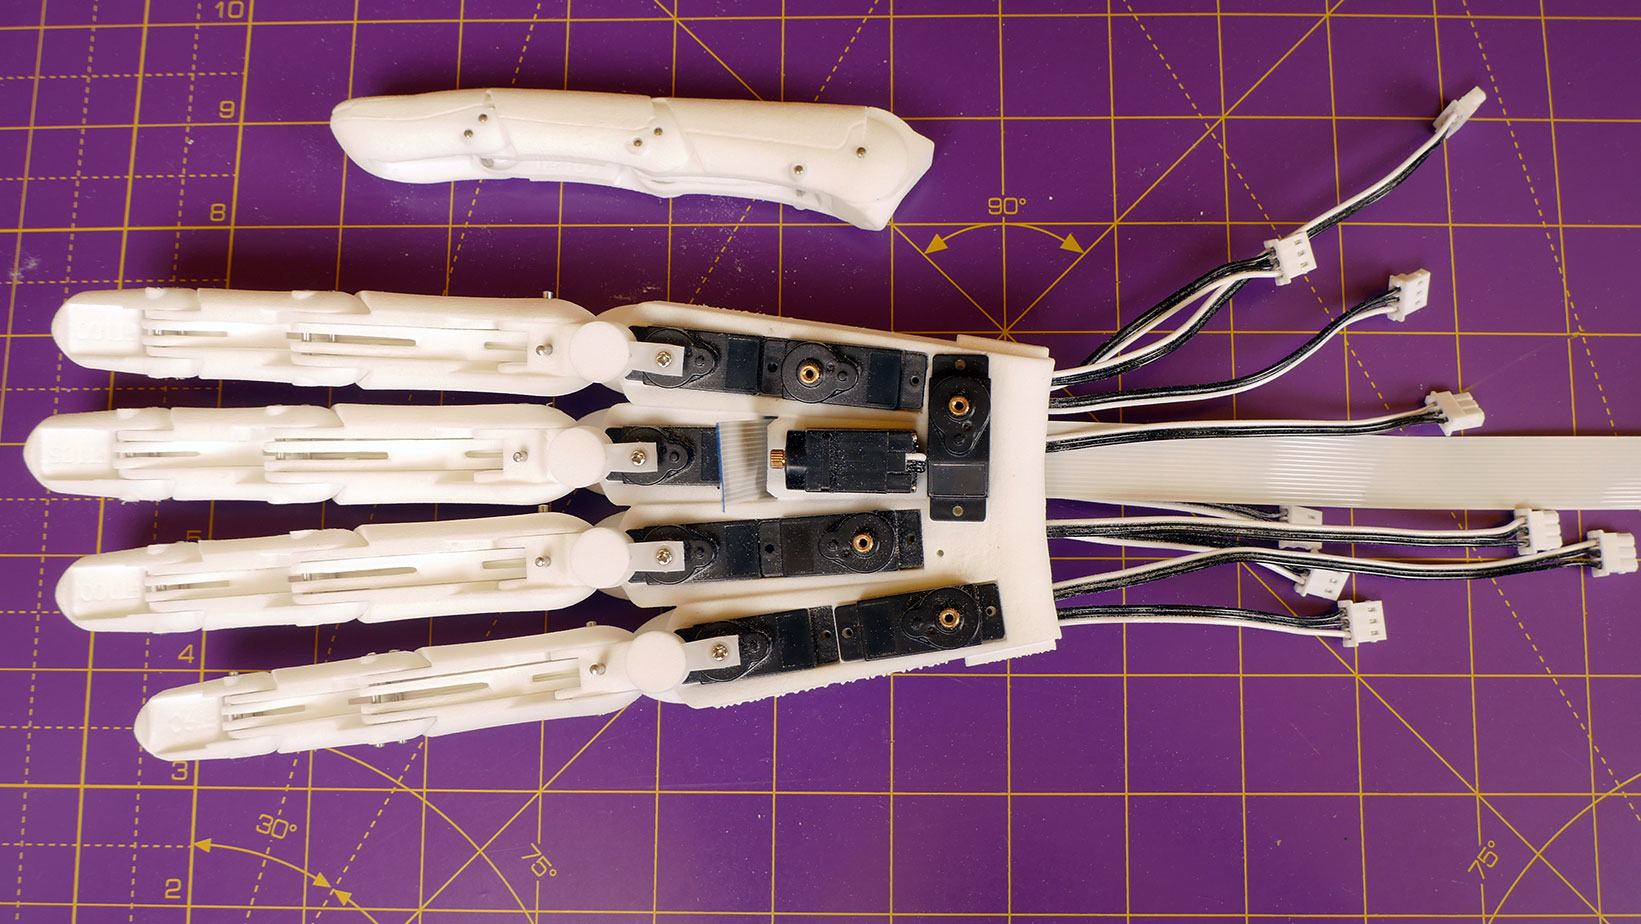
Assemble fingers and thumb
In this step, the individual fingers and the thumb will be assembled and fitted with an elastic band so that they spring open when released from bent.
Tools needed:
1. Small flat blade screwdriver
2. Pliers or side cutters suitable for gripping the pins
3. Fine engineers file, nail file or fine grit sandpaper (300 grit or finer).
4. 2mm drill bit and hand or electric power drill.
Parts needed:
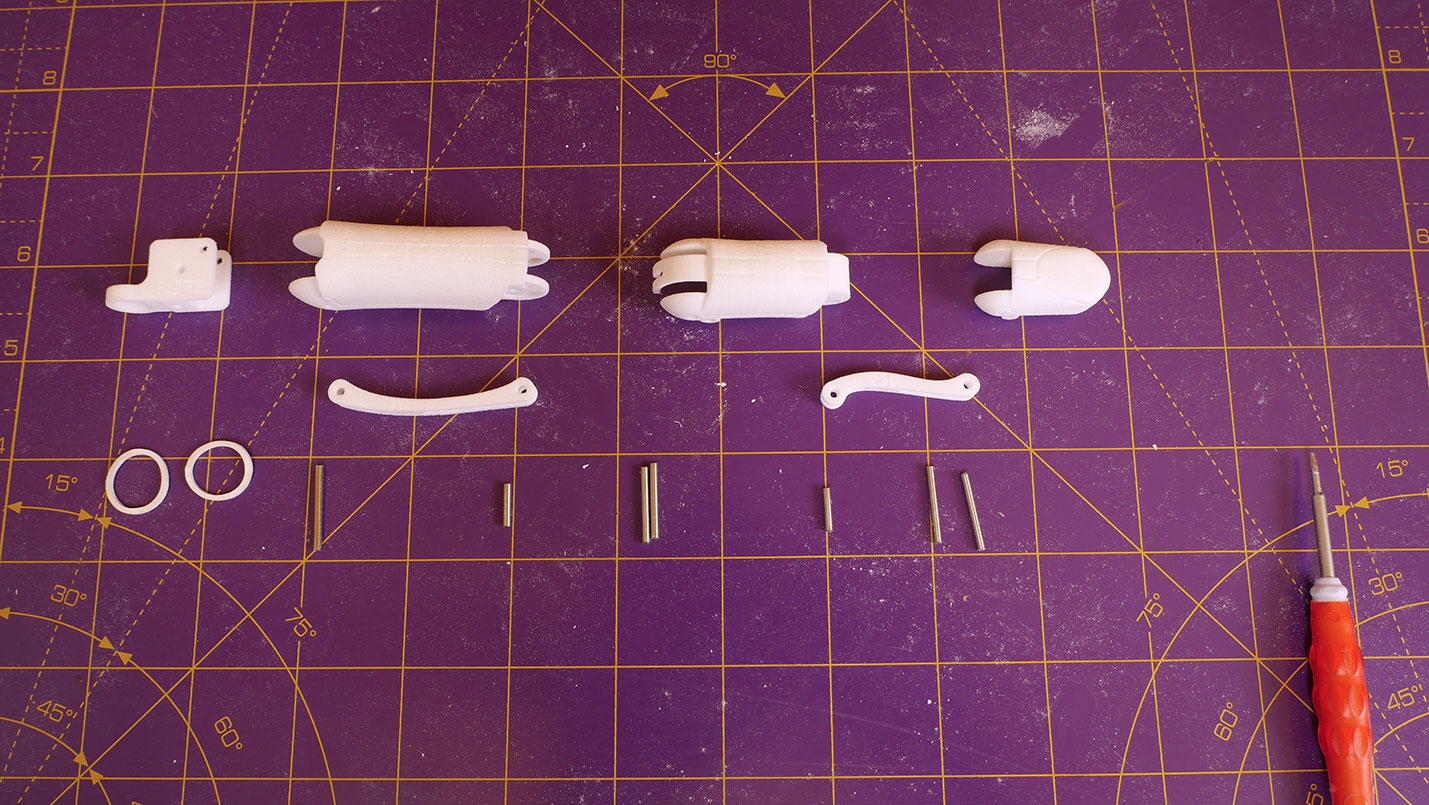
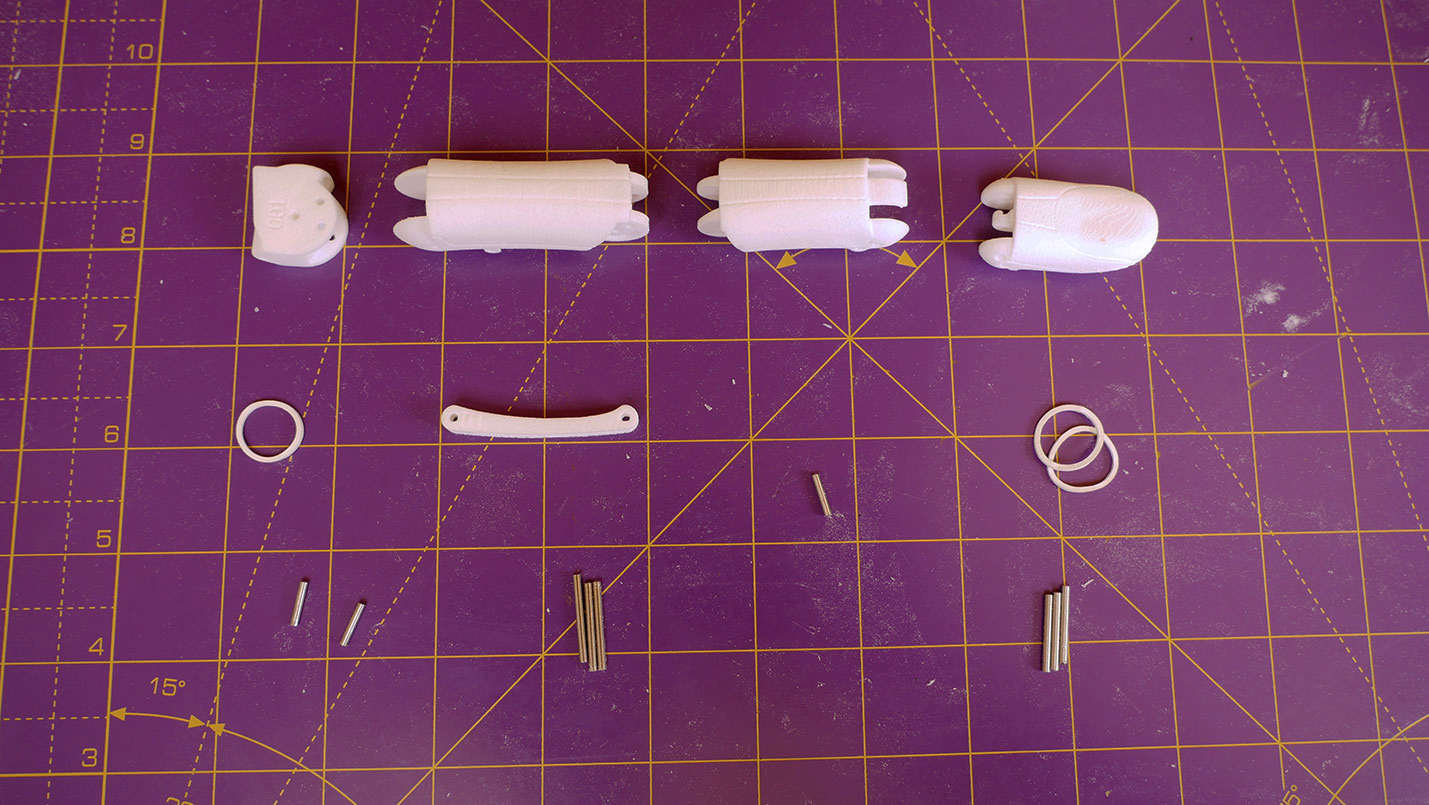
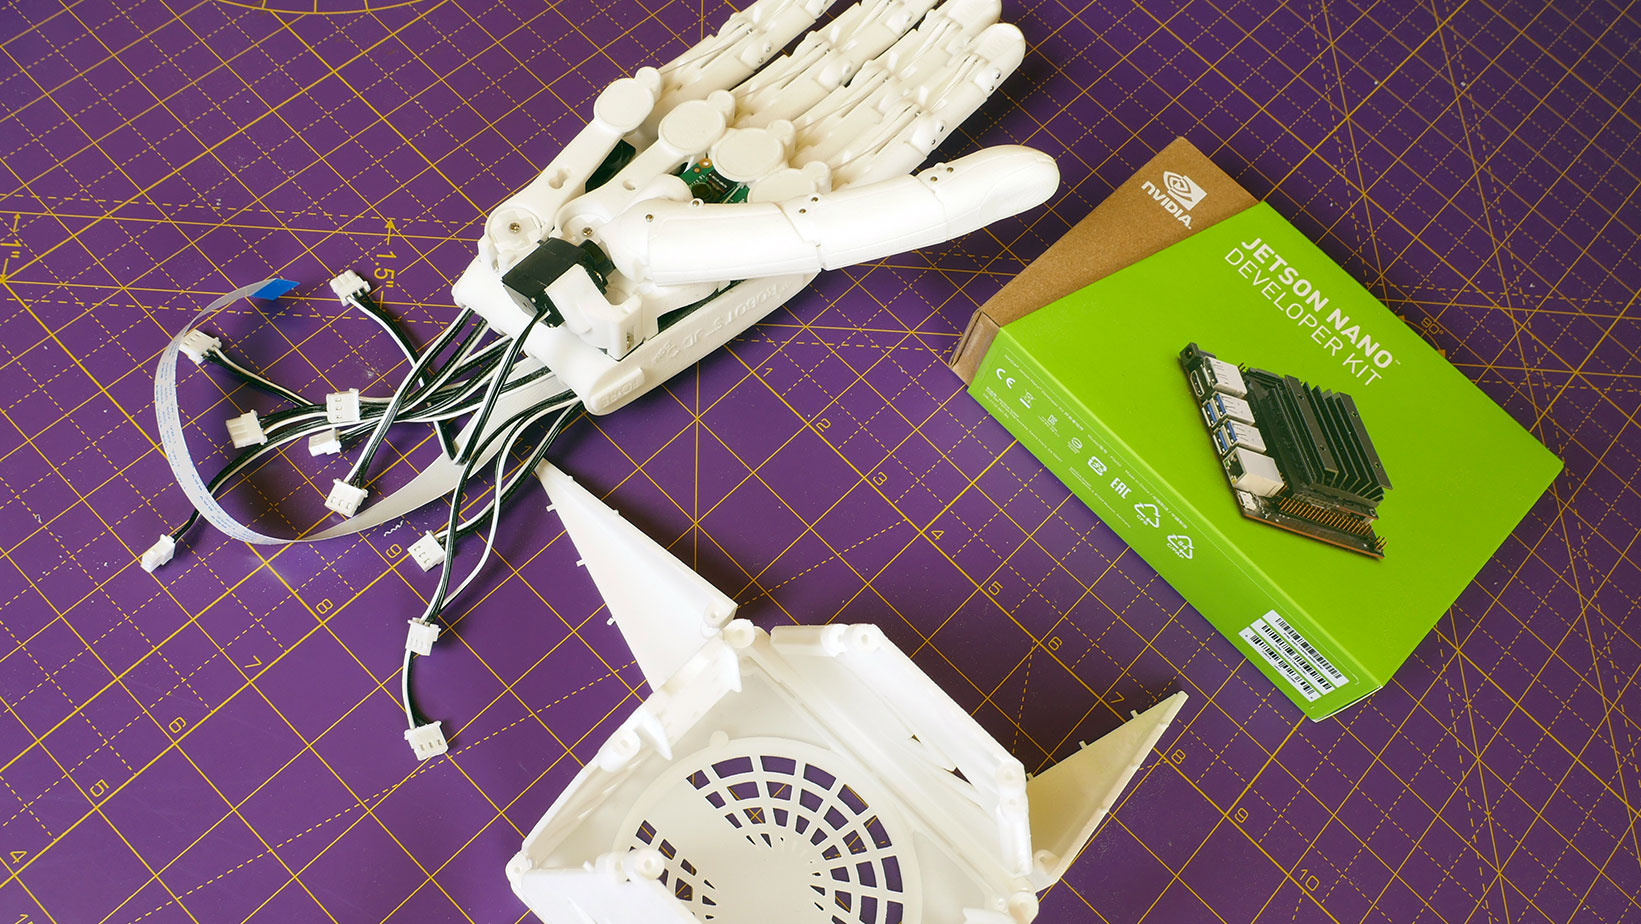
1. Cleaned finger and thumb prints.
2. Elastic bands – latex or polyurethane.
3. Ground steel dowel pins, see table below for the number required at each length (alternatively use 1.75mm printing filament or a wire coat hanger).
The fingers for the hand are 100% size for the fore and ring finger, 105% size for the index finger and 90% size for the little finger.
The instructions to assemble each finger are exactly the same.
The thumb is nearly the same – just the short linkage function is replaced with an elastic band, or two depending on how easily you prefer the tip to bend.
Fingers
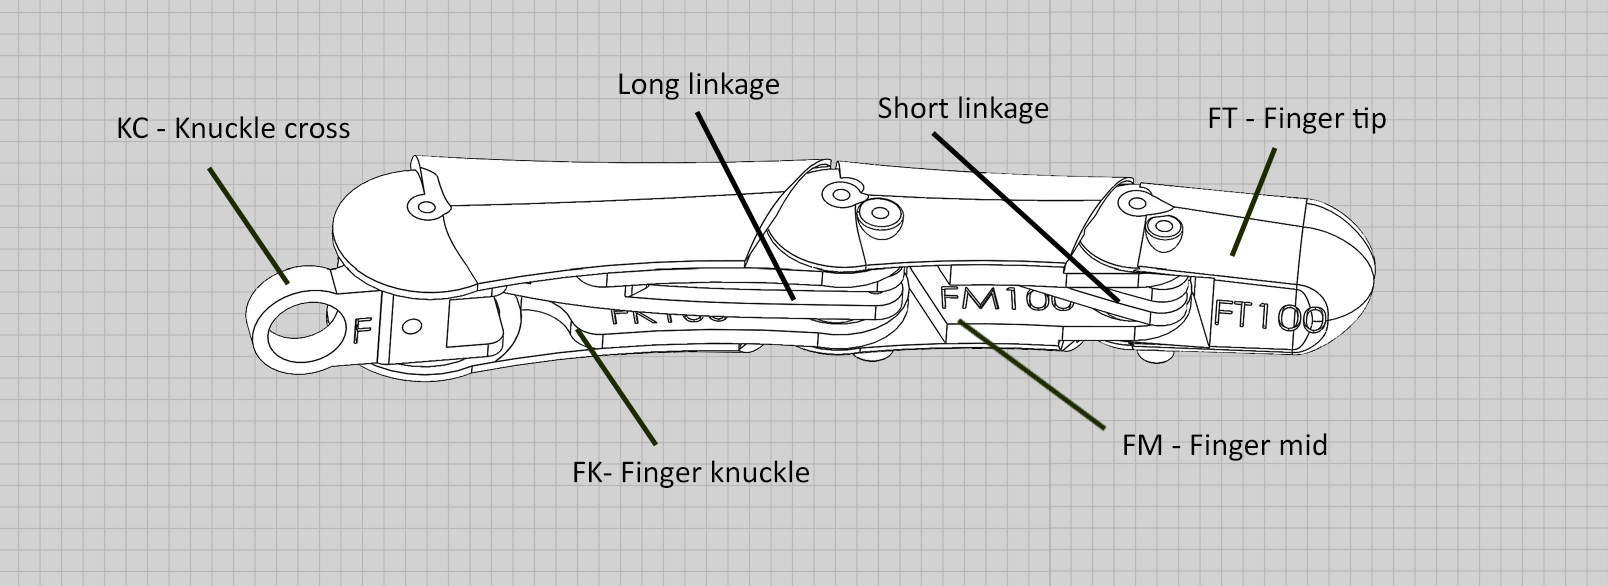
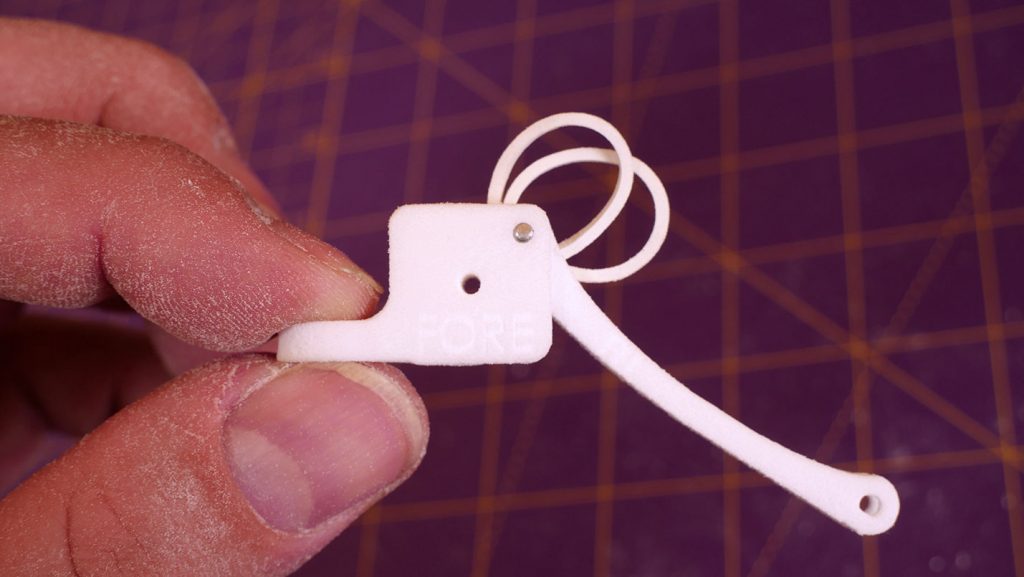
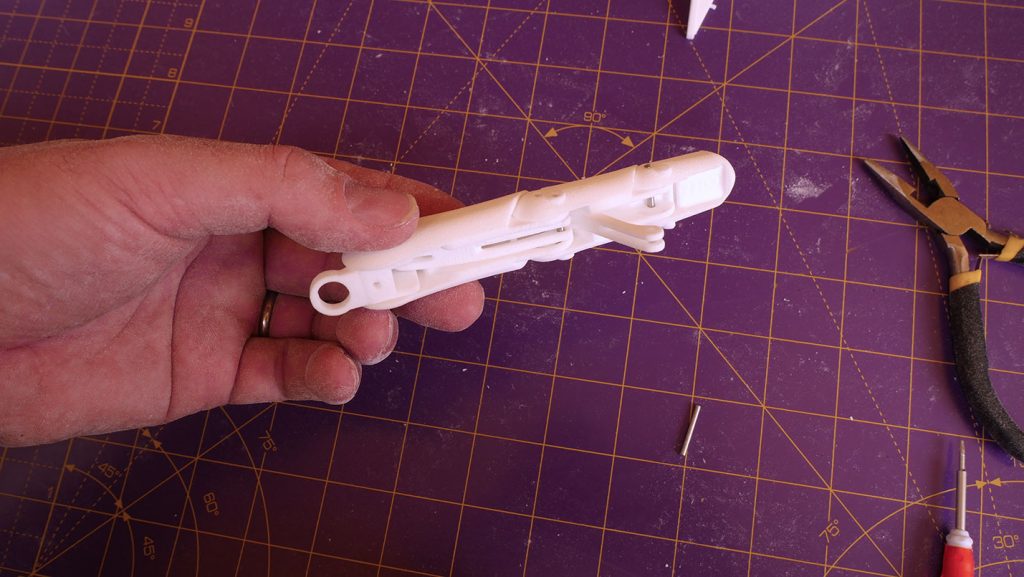
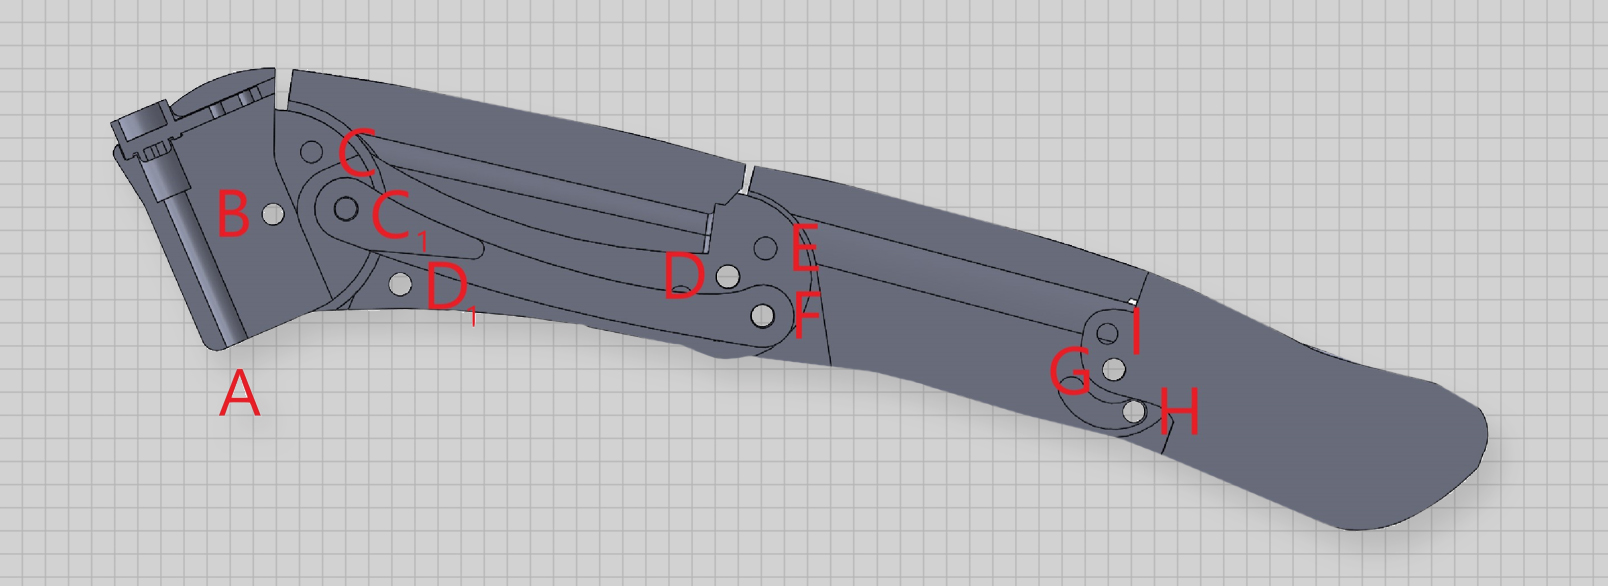
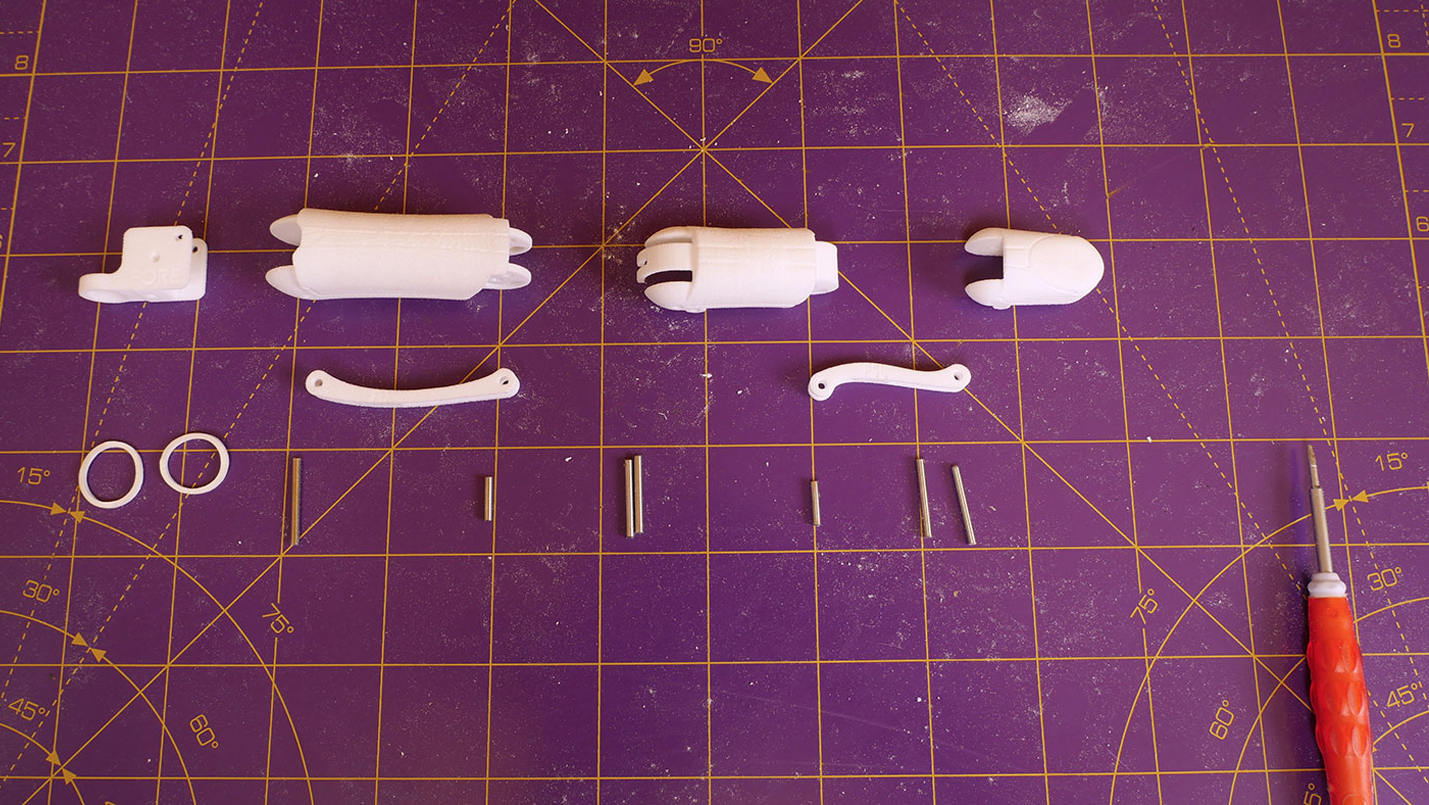
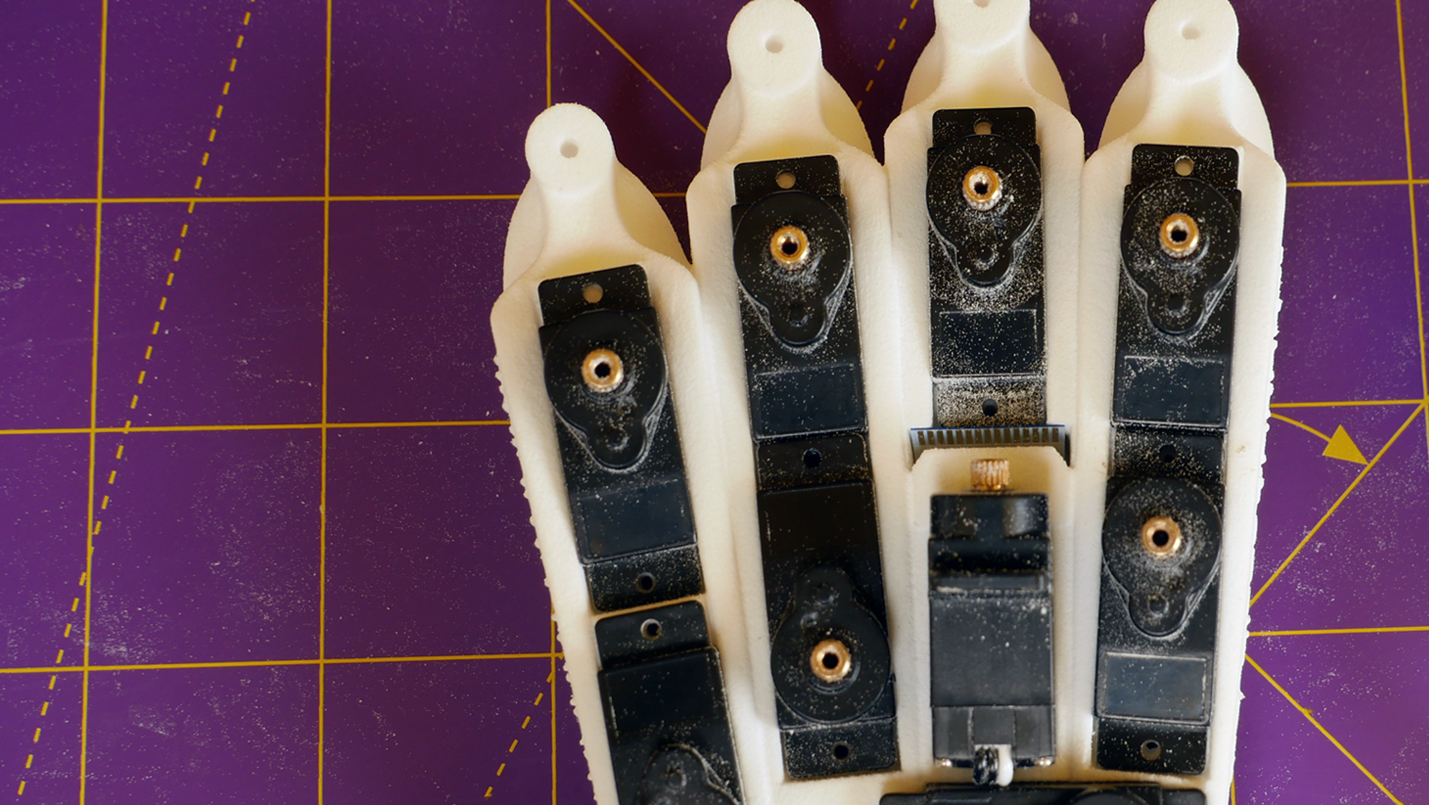
To make the instructions clearer please take a moment to familiarise yourself with the names of each part.
Fingers and the thumb are composed of four main sections:
KC – the knuckle “cross” (similar to the cross in a universal joint)
FK – the knuckle section of the finger
FM – the middle section
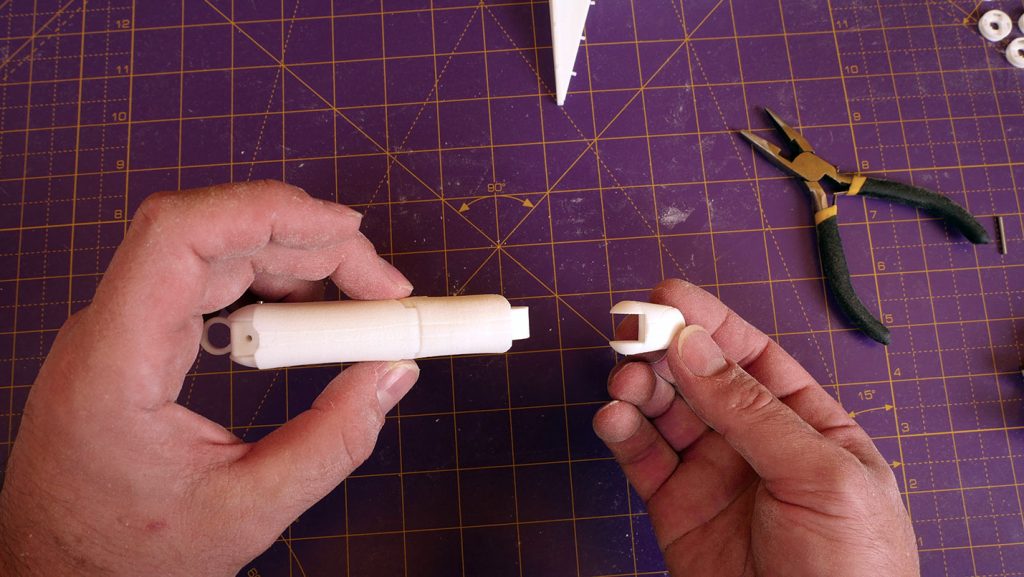
FT – the tip
The abbreviations for the thumb substitute T for the first F, i.e. TK, TM and TT.
The knuckle cross for the thumb looks substantially different – it does not have the large loop at the back.
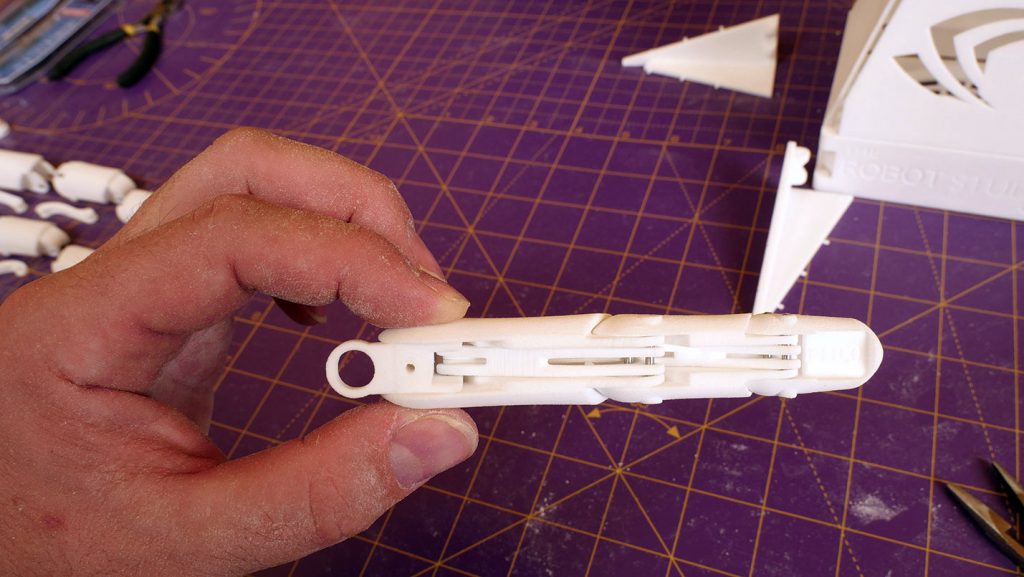
In addition two linkages connect the sections so that the fingers close evenly.
In both the fingers and thumb, a long linkage connects the top of the knuckle cross at hole C (or C1in the thumb) to the proximal (nearside) bottom of the middle section at hole F.
In fingers, a short linkage also connects the distal (farside) top of the knuckle section at hole E to the proximal bottom of the tip at hole H.
In the thumb, these linkages are replaced by one or more elastic bands that keep the thumb tip extended.
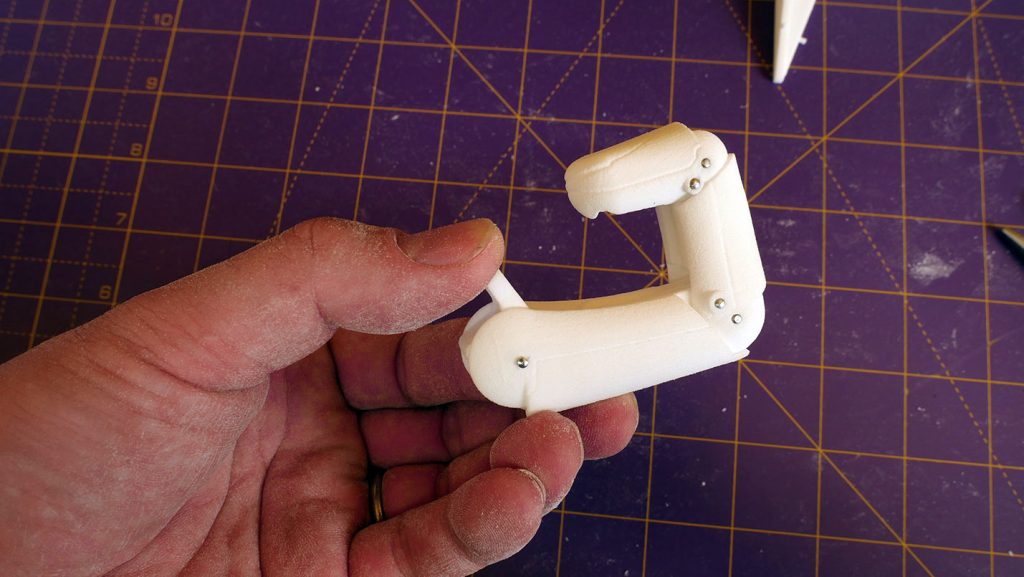
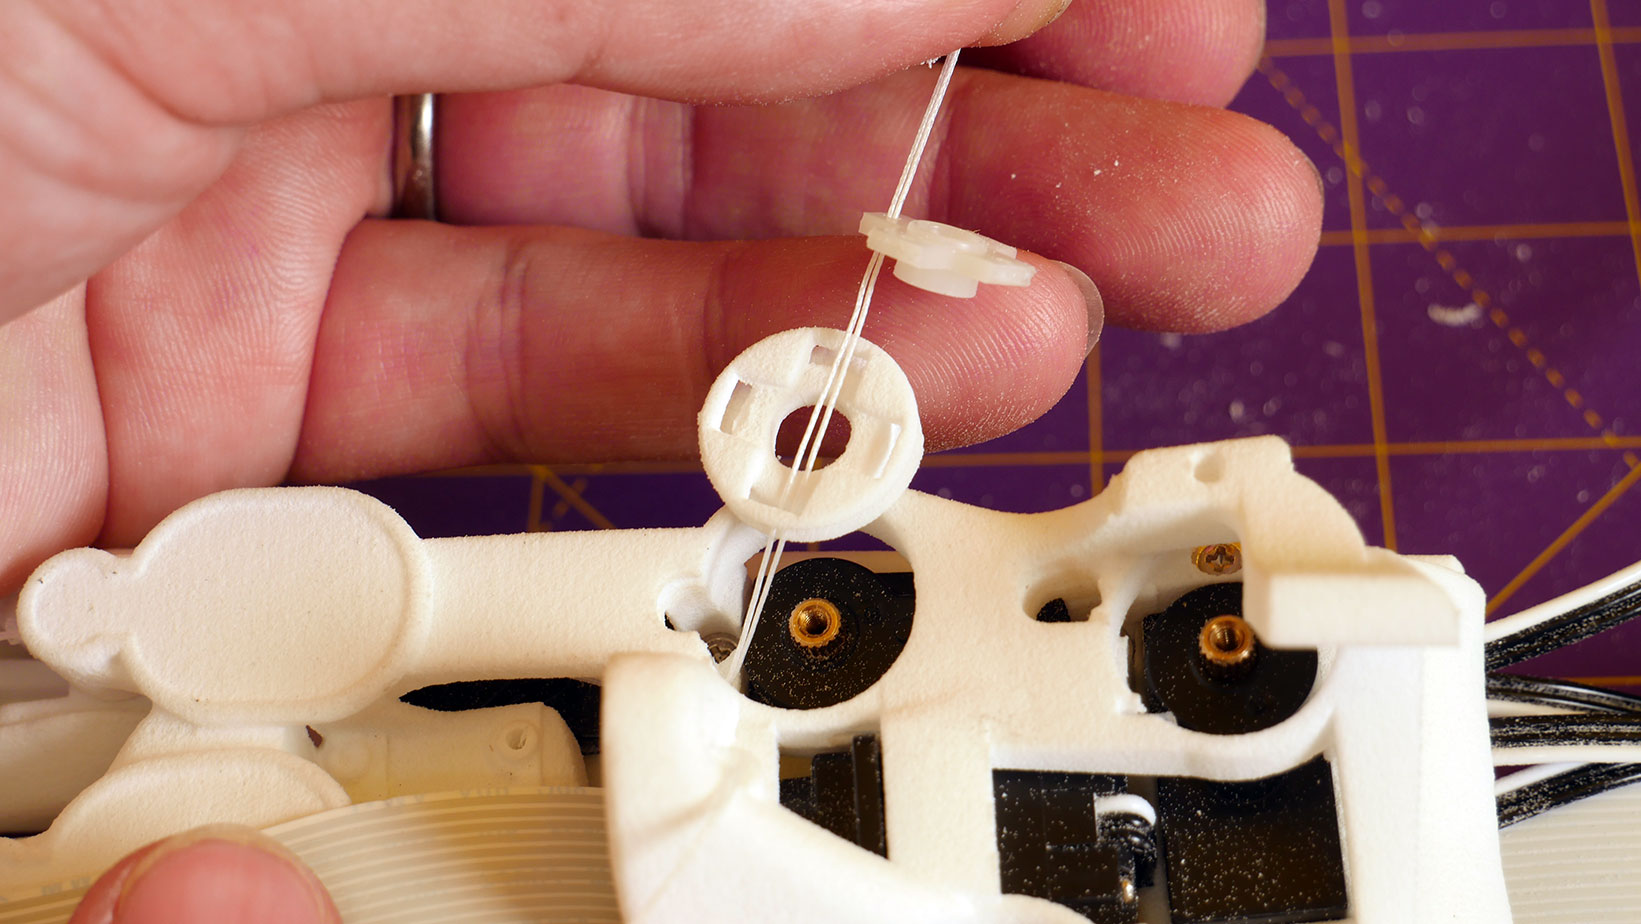
Prepare the pins and elastic bands needed to assemble the fingers (0.30).
Check the knuckle cross holes are a free running fit for the 2mm steel pins (1.18).
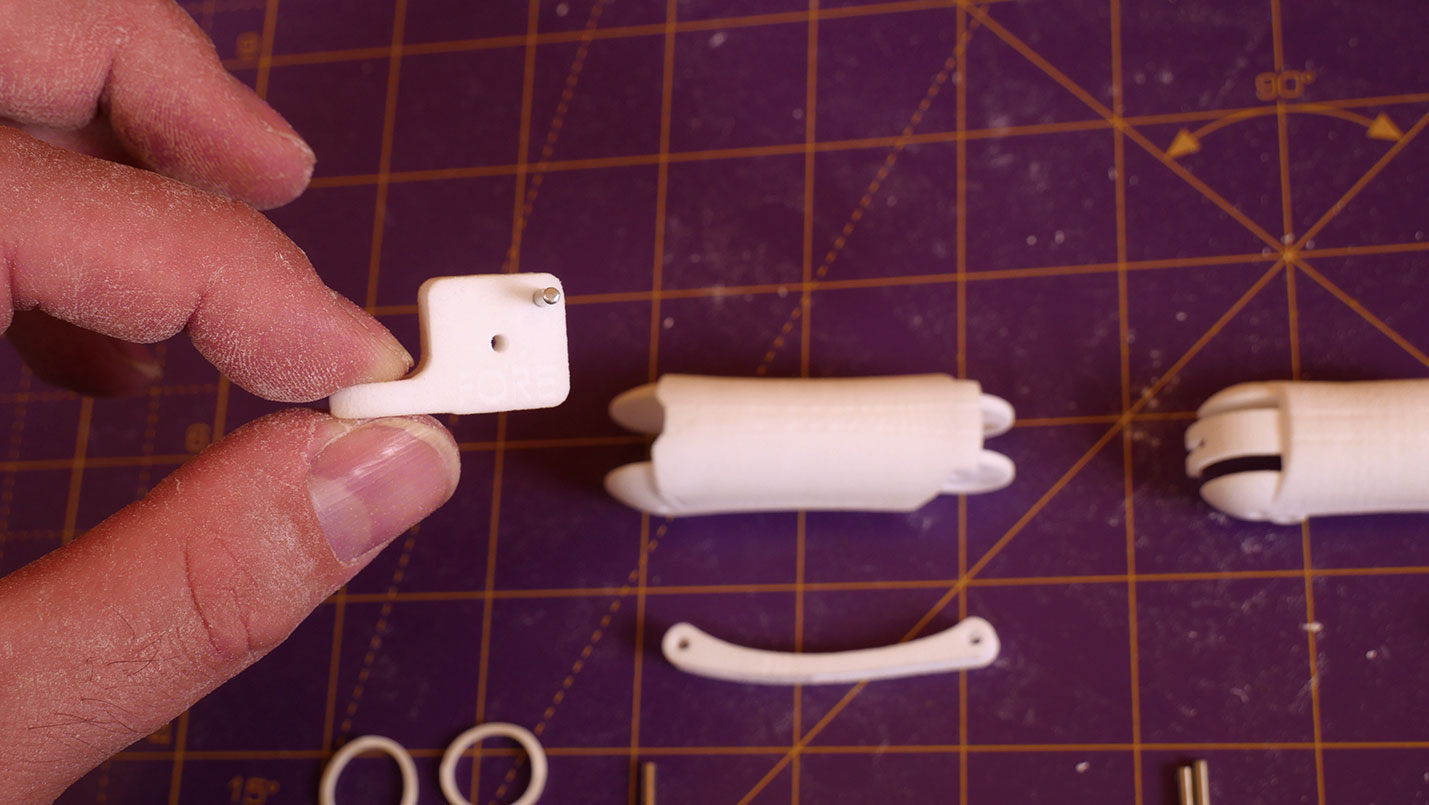
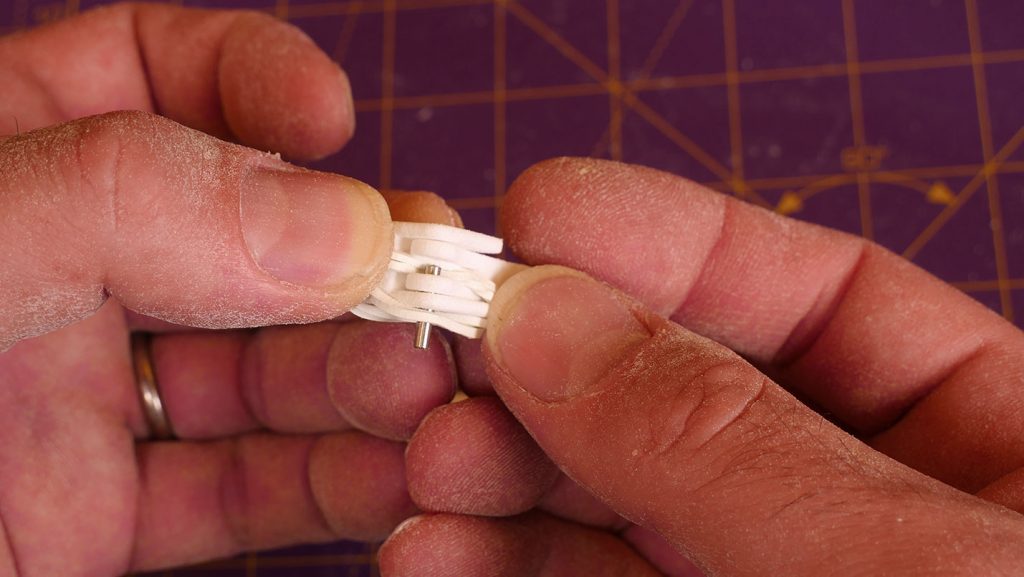
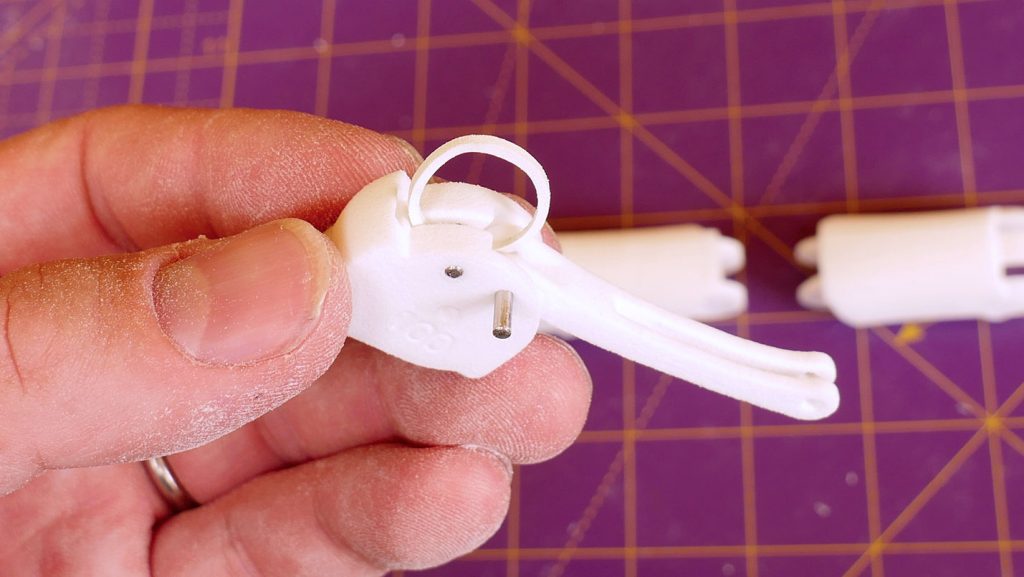
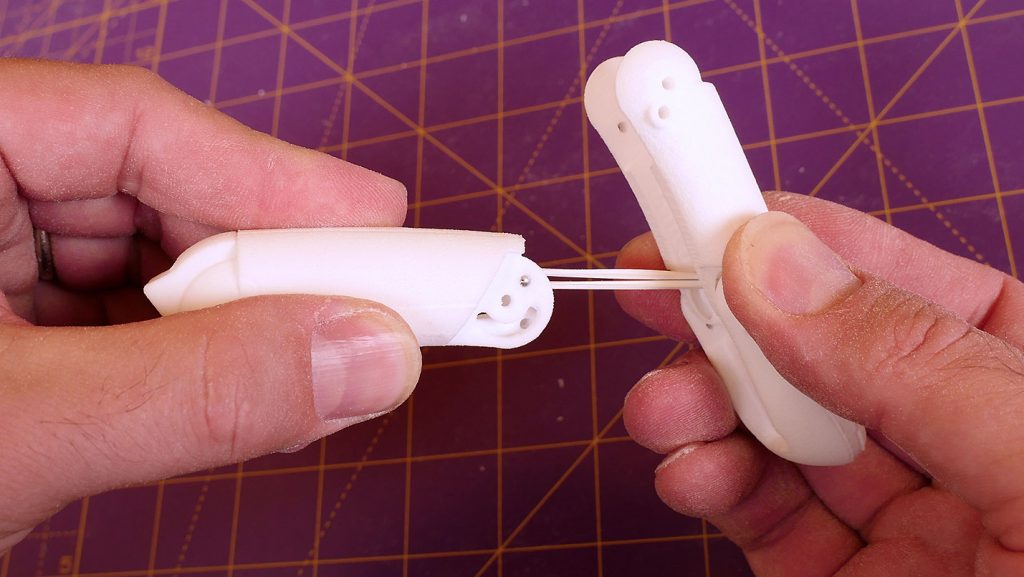
Start by assembling the long linkage to the knuckle crossin the at the top hole C.
Push the pin halfway through as the elastic bands also pass over this pin.(2.25).
In SLS prints the linkages are joined at the middle - so don't worry that the assembly process for extrusion printed hands looks a little different from the video!
The end result is the same, one or two elastic bands between the long linkages, pinned at the top corner of the knuckle cross.
Here you can see how a PU or rubber band passes over the pin and between the linkages – in the end it should look as shown on the right below, a little like an elephant head with the tusks curving upwards:
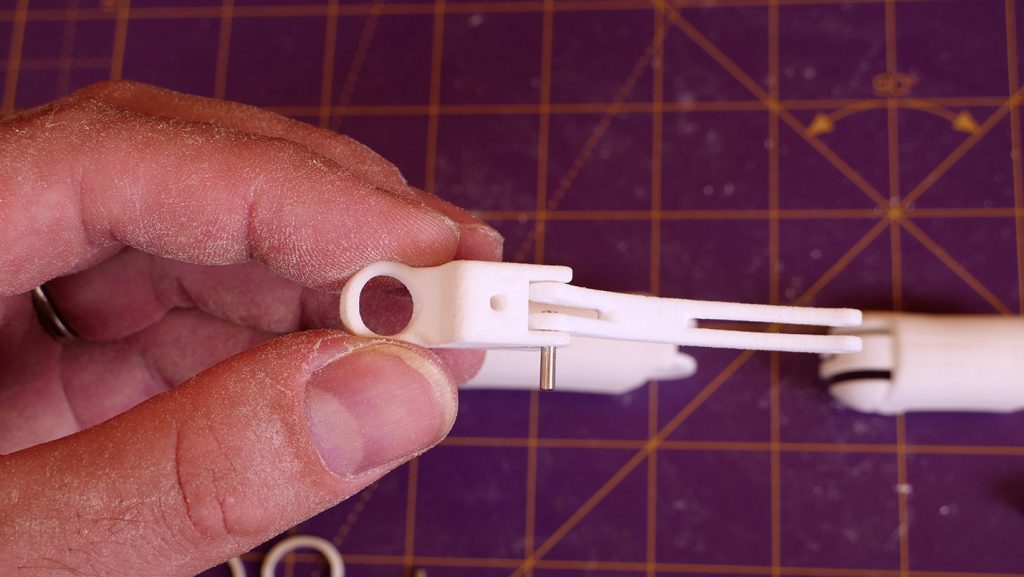
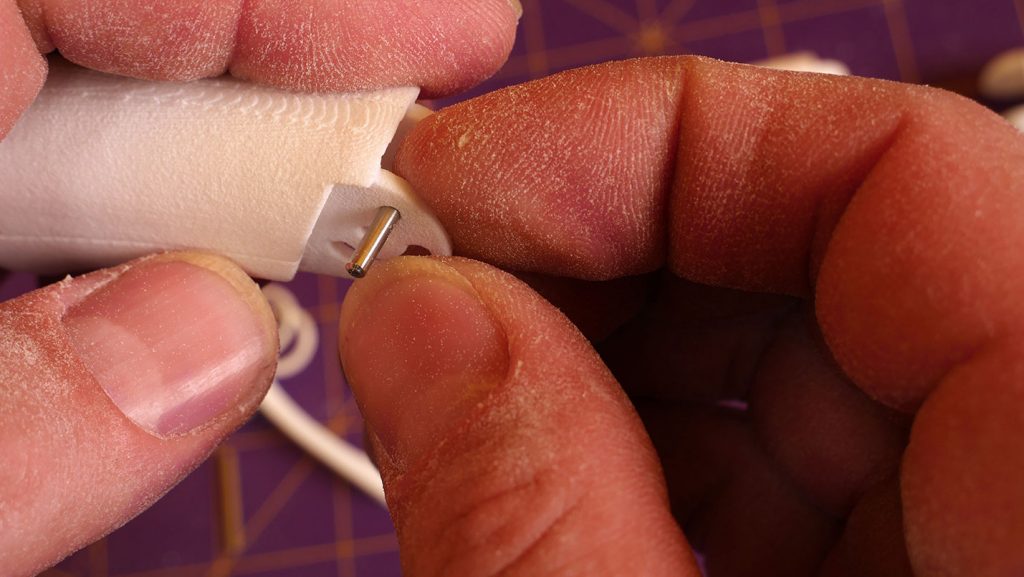
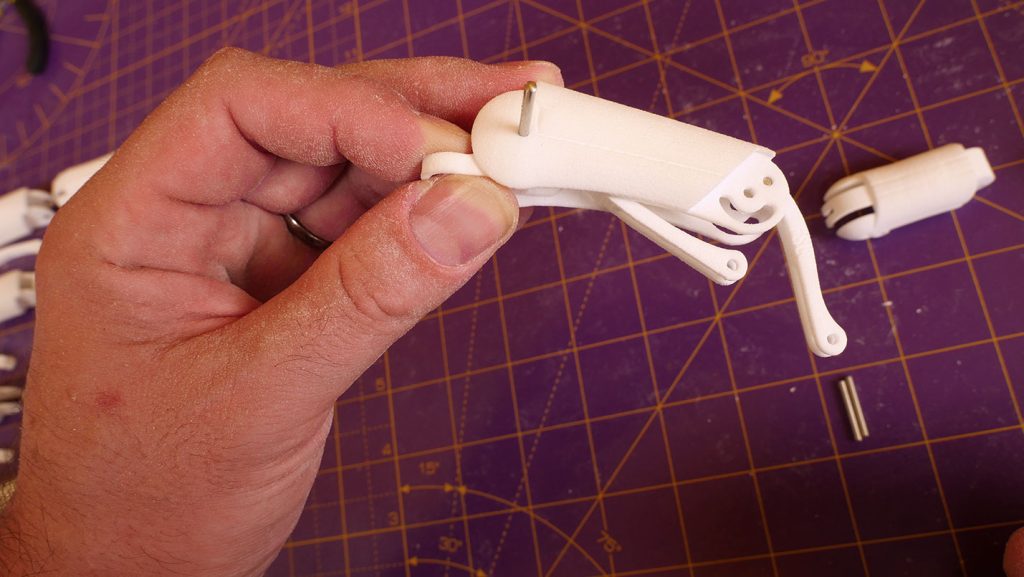
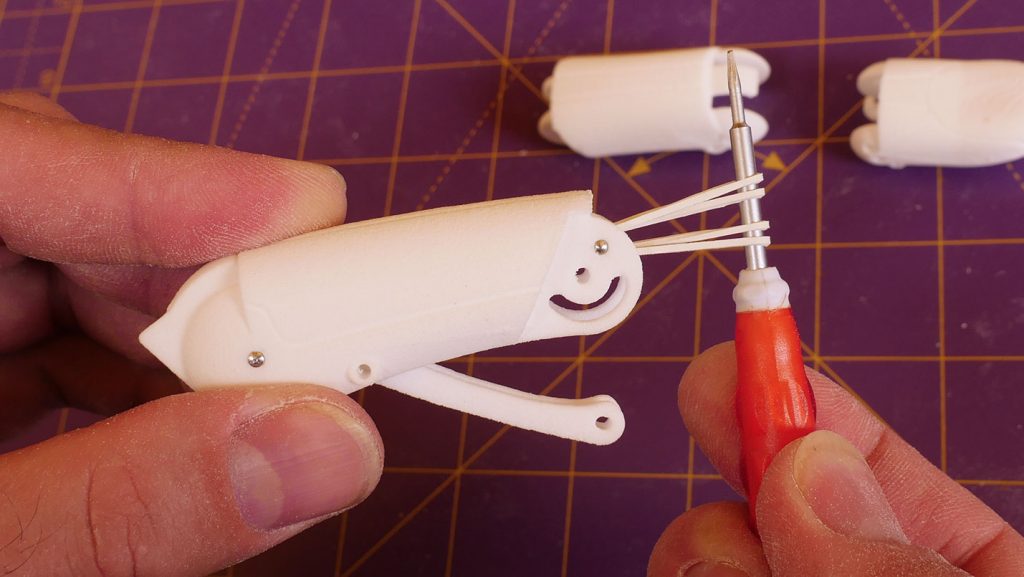
Next pin the short linkage to the E hole of the knuckle section (3.28).
The elastic that is already pinned at the knuckle cross is also retained by this pin.
This has the effect of spring loading the knuckle cross against the knuckle section which in turn extends the finger through the action of the linkages.
Start by inserting a pin through one side of hole E in the knuckle section.
In SLS prints, then hook the bands already attached to the KC between the short ends of the short linkage.
Position the short linkage at hole E and push the pin through just enough that the bands are trapped.
Pull the bands through the gap between the linkage and the other side of the knuckle section before pushing the pin all the way through.
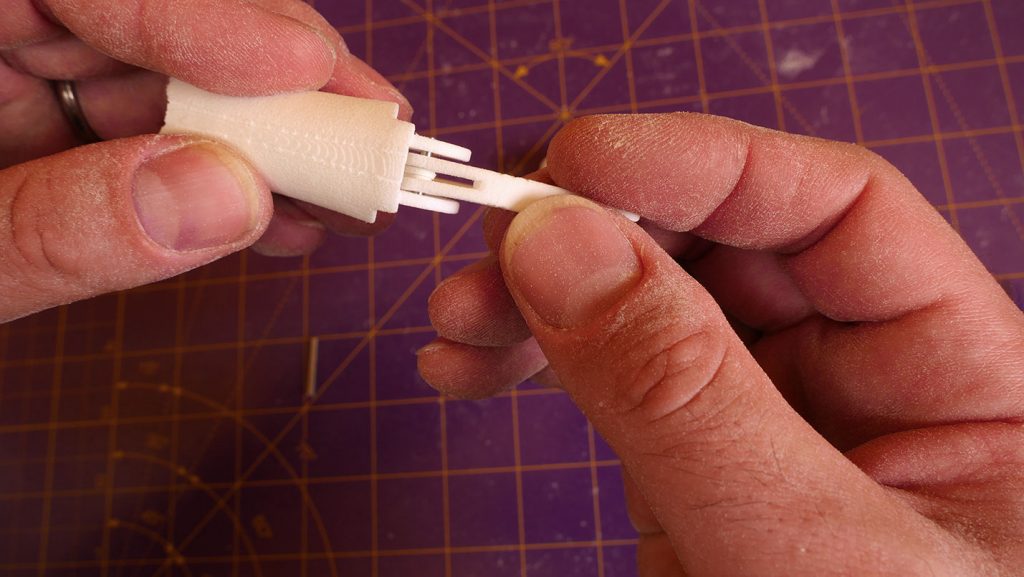
For extrusion prints, the process is a little simpler as the short linkages come in two halves.
Fit one half of the linkage then hook the bands straight over the pin before fitting the other half and pushing the pin all the way through.
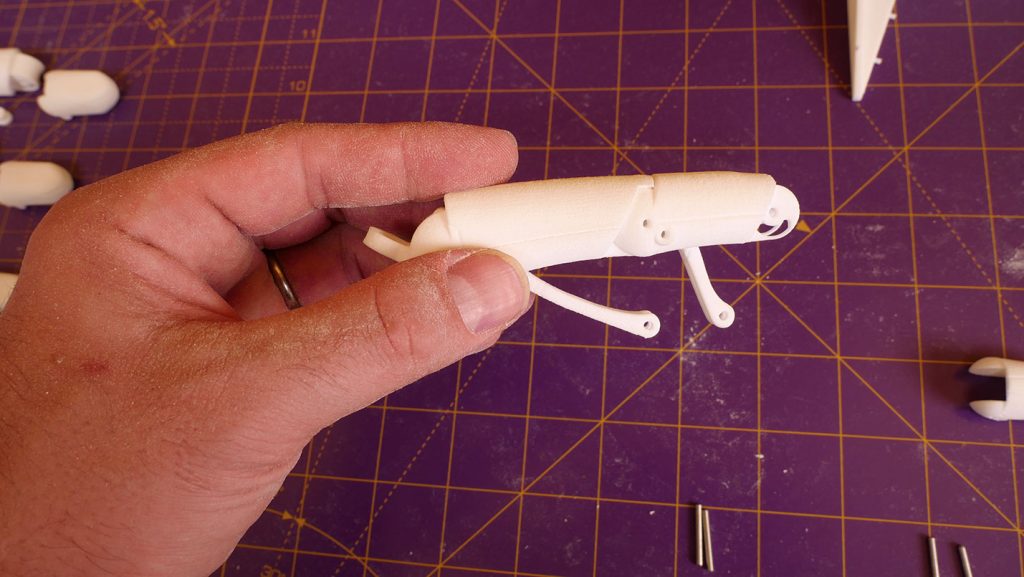
The final position of the bands is to be stretched between the pins in the knuckle cross and the knuckle section.
Make sure the ends of these pins stick in or out an even distance on each side.
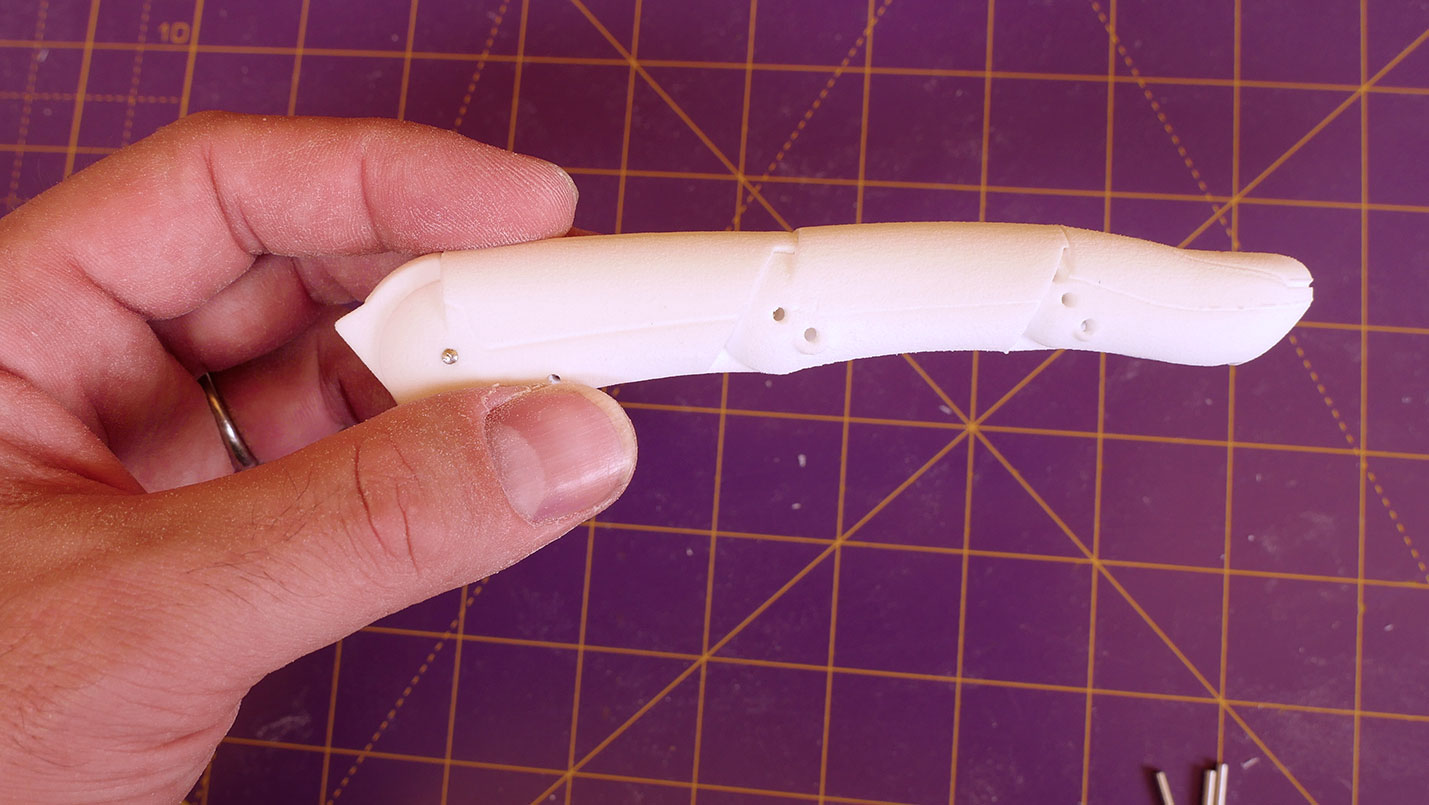
Move the knuckle cross into the assembled position at the proximal end of the knuckle section to stretch the bands.
Secure with a pin in hole B and make sure everything can move freely (5.33).
Pin the knuckle cross in position – it should rotate freely and spring back from the elastic.
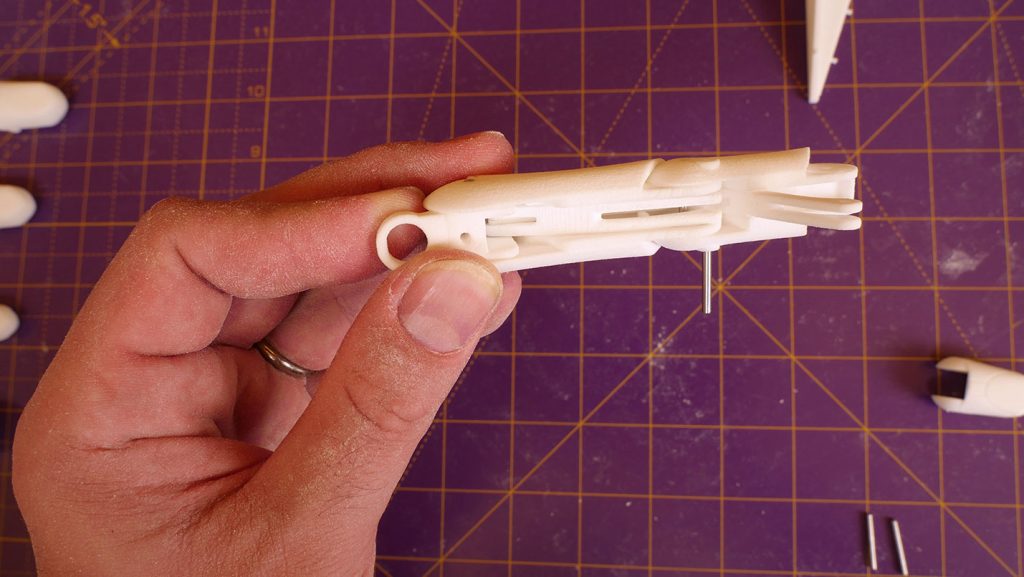
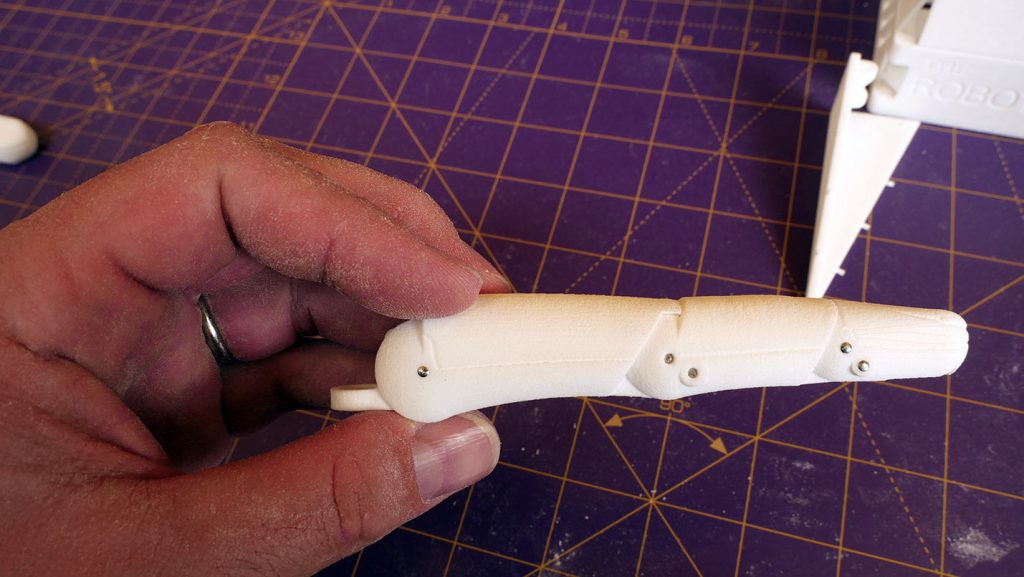
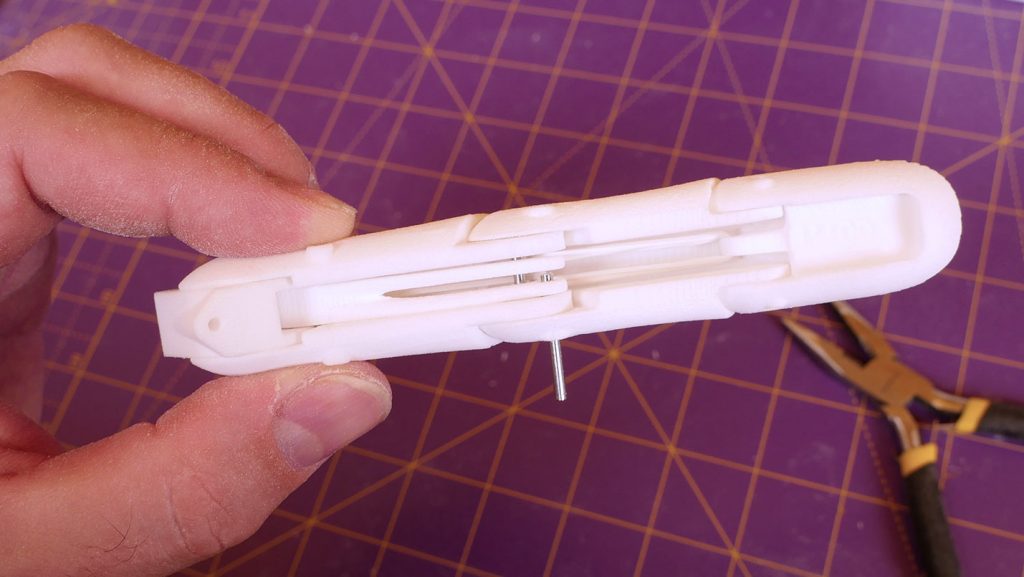
Next pin the mid section to the knuckle section at hole D (5.58).
Pin the distal ends of the long linkage at hole F (7.04).
We use cookies on our website to give you the most relevant experience by remembering your preferences and repeat visits. By clicking “Accept All”, you consent to the use of ALL the cookies. However, you may visit "Cookie Settings" to provide a controlled consent.
This website uses cookies to improve your experience while you navigate through the website. Out of these, the cookies that are categorized as necessary are stored on your browser as they are essential for the working of basic functionalities of the website. We also use third-party cookies that help us analyze and understand how you use this website. These cookies will be stored in your browser only with your consent. You also have the option to opt-out of these cookies. But opting out of some of these cookies may affect your browsing experience.
Necessary cookies are absolutely essential for the website to function properly. These cookies ensure basic functionalities and security features of the website, anonymously.
Cookie
Duration
Description
cookielawinfo-checkbox-analytics
11 months
This cookie is set by GDPR Cookie Consent plugin. The cookie is used to store the user consent for the cookies in the category "Analytics".
cookielawinfo-checkbox-functional
11 months
The cookie is set by GDPR cookie consent to record the user consent for the cookies in the category "Functional".
cookielawinfo-checkbox-necessary
11 months
This cookie is set by GDPR Cookie Consent plugin. The cookies is used to store the user consent for the cookies in the category "Necessary".
cookielawinfo-checkbox-others
11 months
This cookie is set by GDPR Cookie Consent plugin. The cookie is used to store the user consent for the cookies in the category "Other.
cookielawinfo-checkbox-performance
11 months
This cookie is set by GDPR Cookie Consent plugin. The cookie is used to store the user consent for the cookies in the category "Performance".
viewed_cookie_policy
11 months
The cookie is set by the GDPR Cookie Consent plugin and is used to store whether or not user has consented to the use of cookies. It does not store any personal data.
Functional cookies help to perform certain functionalities like sharing the content of the website on social media platforms, collect feedbacks, and other third-party features.
Performance cookies are used to understand and analyze the key performance indexes of the website which helps in delivering a better user experience for the visitors.
Analytical cookies are used to understand how visitors interact with the website. These cookies help provide information on metrics the number of visitors, bounce rate, traffic source, etc.
Advertisement cookies are used to provide visitors with relevant ads and marketing campaigns. These cookies track visitors across websites and collect information to provide customized ads.